Monday 6 October 2014

Spooky Sundays

I'm sorry I've not posted in so long! Life has caught up with me a little bit. Working full time and maintaining YouTube is proving more difficult than I thought it would!

I've decided to start Halloween videos, now that October is here and Autumn is upon us. I'm terrible at thinking of catchy names, but alliteration is always a good move...

I've only done 2 Spooky Sunday videos at the moment, but they're a great way to get started with preparing for Halloween! They're also relatively straight forward to do, which is always a bonus.

First up is this skull bracelet, made using plastic skull beads with leather cord.


The technique used is common amongst macramé; the square knot. If you're interested in starting macramé, the square knot is a great place to start!

The second video I made is for this 3D beaded spider! I found the pattern on this blog and knew that I had to give it a try! I was chatting to Sarah from SoCraftastic, and we said that we wanted to learn to make 3D beaded animals. Spiders were perfect for this time of year :D


I can't wait to learn to make other types of animals and other techniques to make 3D beaded animals :D

Nectarine Tartlets!


Hello! In this video, the boyfriend and I show you how to make delicious nectarine tartlets that are incredibly easy to make! They almost look professional, but you only need a couple of ingredients to make them.

It's nectarine season at the moment, so they're really cheap in UK supermarkets: we bought a punnet of 6 nectarines for only 84p! Bargain.

So to make these tarlets, you will need:
2 tbsp caster sugar (approx)
1 tsp plain flour (plus extra for dusting)
Ready-to-use puff pastry
2 nectarines
1 tbsp apricot jam

Watch the video to see how to put it all together :)

Sunday 31 August 2014

Deliciously Light and Fluffy Scones!

The boyfriend and I decided to show you all how to make really tasty scones, perfect for an English afternoon tea, in today's video! I suppose it's only fair that I actually share the recipe with you ;)


Ingredients:

250g self raising flour
pinch of salt
50g caster sugar
50g chilled unsalted butter
1 medium egg
100ml (approx) buttermilk/whole milk

You'll also need a pastry cutter and a baking tray, either lined with baking paper or lightly greased.

Preheat the oven to 220°C/425°F/gas mark 7.

Whisk or sift together the flour, salt and caster sugar. Dice the butter into the dry mixture and rub it in, using the tips of your fingers. Once the mixture resembles small breadcrumbs, beat the egg and the milk together in a bowl and add it, a bit at a time, to the mixture. Using a round-bladed knife (or just a table knife...), mix in the liquid. When it's all combined, bring the dough together with your hands. On a floured work surface, and shape into a flat, but tall, shape. Try not to handle to dough too much to avoid heavy scones.

Cut out your scones, then place them on your baking tray. Pop them into the oven for 10-12 minutes, until they're a nice golden brown. Transfer to a wire rack to cool. Sprinkle on sugar (if you want to) while they're still warm.

These can be eaten both cool and warm. Best served with a tonne of jam and clotted cream and a delicious pot of good-quality tea!

Monday 18 August 2014

teapigs - Video Roundup

If you haven't been watching my recent videos on YouTube, you may not be aware of how generous the people at teapigs have been with me! They've been kind enough to send me tea to make videos on and give my opinions about it!

I received a Chai, Chilli Chai, Peppermint and Licorice, Lemon and Ginger and their new Matcha drinks! I can't believe how kind they have been!

It's not just me who benefits though, you all do too! If you use the voucher code "craft" in the promo code box when buying your tea, before the end of August 2014, you will receive a whopping 10% off!! Such generosity! http://teapigs.co.uk

Here's a recap of the videos that I've filmed so far, featuring teapigs tea.

First of all, I made chai cupcakes! These were delicious and had the gorgeous taste that the blended spices of chai provides.


My next video was showing how to make iced tea, using the Lemon and Ginger tea. It's so simple to make iced tea, and it's perfect for those (rare) hot days. I also made iced tea using the Licorice and Peppermint tea.


Finally (for the moment) I filmed a tea review for the matcha drinks. I did tea reviews on my old YouTube channel, but enjoyed making and filming them so much, I decided to transfer them over!


Be sure to head on over to http://teapigs.co.uk and check out their range of teas! They have everything for any mood or feeling. (They also make great gifts for tea-lovers ;) )

Thursday 14 August 2014

DIY Tattoo Choker

There were so many trends from the 90's that should definitely stay there and be forgotten about, but tattoo chokers aren't one of them! I was so pleased when I saw that they were making a comeback, along with 90's grunge fashion. I definitely wore beaded ones back in the day, although I wasn't particularly fashionable or "grungey", much like the people dressing like that today!

I was outraged when I saw that Topshop were selling these stretchy chokers for £5.00 each! Something so expensive for something so simple to make. Even Claire's Accessories are selling them for £4.50. No thank you! It was at this point that I started researching how to make them. I found a couple of really-good YouTube videos that taught me the technique, but I wanted to add beads too and no one had attempted that yet (from what I had seen anyway...)


I had a bit of a play around with making a couple of bracelets before giving the choker a go and I think I have worked out the technique.


I used 0.7mm Stretch Magic in Black, size 8 black Czech glass seed beads and a size 3 crimp tube to finish it off. I do explain an alternative way of finishing in the choker in the video above.

Have fun going back to the 90's! Be sure to share a pic on Instagram with me, @TheCornerofCraft, by using #TheCornerofCraft (or #TheCofC if you can't be bothered to type it all out...)

Thursday 3 July 2014

Chocolate Chunk Shortbread Recipe

So Sunday was stocktake day at the shop I work in. I work in a bead shop so this involves a lot of concentrating, counting and weighing. We knew it was going to be a long day, so it only made sense that cake should be there too!


My contribution to the sweet treats were some delicious chocolate chunk shortbread, which were cut out into adorable teapot shapes! (How cute is my crockery btw??)


To make, these cute shortbreads, you will need:
225g unsalted butter
110g caster sugar
110g corn flour
225g plain flour
1 pinch of salt
50g dark chocolate
50 milk chocolate


Method:

1) Line your baking trays, either with baking paper or grease with butter.

2) Whisk together the butter and caster sugar until the colour is a pale yellow. This should take a couple of minutes. Don't forget to scrape down the sides of your bowl with the spatula! Sift in the flour, corn flour and pinch of salt into the butter/sugar mixture and mix until combined. I found a wooden spoon easiest for this as corn flour will fluff up and go everywhere...

3) Cut your chocolate into chunks and add to the mixture. If you'd prefer to use pre-chunked chocolate or choc chips, that's also fine! Mix the chocolate in well.Bring the dough together and put it onto some baking paper. Put another piece of baking paper on top and roll out the dough until it is about 1cm thick. The baking paper will stop the dough sticking to your rolling pin!

4) Cut out the biscuits into the shape you want and pop them onto the lined baking tray. After you have cut all your shapes out, put them into the fridge for 30 minutes while your oven is preheating to 170 degrees celcius.

5) Put the biscuits into the oven for 20 minutes, or until the edges are golden brown in colour. Everyone's ovens are different so you may want to check frequently.

6) After cooking, leave the biscuits on the baking tray for a couple of minutes to cool before transferring to a wire cooling rack. I personally made a small tray out of foil to put until my cooling rack. This is because you now want to sprinkle sugar on top of the biscuits, and sugar will go everywhere unless it's contained! Then you're finished :)

Tuesday 1 July 2014

Loom Band Butterfly: How To!

So I am late at hopping on the bandwagon, I know! Children are going absolutely mad for these small elastic bands, and I should know: I work in a shop that sells them. We can't get them in stock quick enough, it's ridiculous! And it doesn't look like the trend is slowing down any time soon.

Because I am a serious novice, I won't be making many YouTube videos on how to make "Rainbow Loom" or stretch band (or whatever you call it...) bracelets and charms. There are so many other YouTubers out there who have a lot more skill and talent than me in that area of craft!

We got a new book in at work, called Rubber Band Bracelets by Lucy Hopping and I was having a flick through it and saw something that took my fancy: loom band butterflies! The best part is, you don't even need a loom to make them!

I don't have any sort of "official" hook, so I just used my crochet hook, because I have plenty of them lying around my house... I picked up some bands and went for it.

I can't believe how easy it is to make these little butterflies. I had 4 made in no time at all. You can use these butterflies as charms to enhance the bracelets you're making, but I glued mine onto a hairclip and brooch back so I can wear them that way instead.


Saturday 21 June 2014

Where I Find Patterns: Bead Loom

When I first started make bead loom bracelets, I used other people's patterns because I wanted to be sure that the pattern would work and look good! As my confidence grew, I wanted to experiment a little more with making my own patterns, which I did using BeadTool.

BeadTool allows users to easily create patterns for any beading, be it brick stitch, peyote, square stitch or beading on a loom. You can select the stitch that you want to use, which will change the grid, and select the colours you want to use from the full selection of Miyuki Delica palette listed on the program. Simply select the colour that you require, and draw in the squares! Easy! BeadTools offers a free download of this program so you can try it out, test it and see if it's something you want to buy. It's only £30, which for a beading program, isn't too bad at all! The downside is that with the free trial, you are unable to save your patterns you've created and you also can't screen capture them. I guess it makes sense though.

Another alternative is to use friendship bracelet patterns. My websites of choice for these are http://friendship-bracelets.net and http://braceletbook.com. If you click through to the "alpha" patterns, you will see a grid design, identical to a bead loom pattern! There are hundreds of premade patterns to suit every occasion, but also on both of these websites, you have the opportunity to create your own patterns and submit them to the site, so other people can use them! I have done this for a couple of patterns, such as this one:


And this one:


You can then read these patterns just like you would a regular bead loom pattern, where each square is a bead.

Here are a couple of examples:


Source


Source 


So that is where I find my bead loom patterns! Where are your favourite places to find bead loom patterns?

Thursday 19 June 2014

Delicious Strawberry Yoghurt Ice Lollies!

The boyfriend and I "treated ourselves" to some ice lolly moulds from ASDA a couple of weeks ago. I mean, they were only £2.50 so we were hardly breaking the bank! That evening, we decided to whiz up some strawberries, add some yoghurt and a touch of sugar then freeze them to see what happened. Turns out we'd made delicious lollies!

The lolly mould we've bought (image from ASDA)


We were clever and didn't note down quantities but that day we had enough mixture to make 6 lollies. I decided to film a video for The C of C on YouTube on how I made these, as I'd had a request via my Facebook page so here we go!

To make 5 lollies, you will need:

20 Strawberries (The strawbs I used were pretty small!)
5 tbsp Low Fat Natural Yoghurt
2 tsp Granulated Sugar

Utensils:

Lolly Mould (or yoghurt pots that have been washed out and lolly sticks)
Stick Blender
Spatula
Spoon
Teaspoon
Jug
Chopping Board
Sharp Knife.

Start by hulling the strawberries (this just means taking off the leaves and stalk" and place 15 of them in the jug. Slice the other 5 strawberries thinly and place to one side as these will line our moulds.

Whiz up the strawbs in the jug using the stick blender until there are no lumps left. Scrape excess juice off the blender using the spatula.

Spoon in 5 spoonfuls of the yoghurt and give it a mix. Taste and if it isn't sweet enough for you, add the sugar. I find that 2 tsp is enough, but you can add more if you like.

Line the lolly moulds with the thinly sliced strawberry, just adding slices sporadically. Pour in the strawb-yoghurt mixture.

Gently bang the mould on the counter a couple of times to pop any air bubbles, add your sticks and pop the lollies into the freezer for at least 3 hours.

If you can't get the lollies out of the moulds once frozen, run the mould under some cold tap water for around 10-15 secs and you should find that the lolly comes right out!

Enjoy!


Saturday 14 June 2014

How to Make Bead Loom Bracelets!

Creating beadwork on a loom is something that has been done for centuries by the Native Americans, along with others. It is a quick and easy way to create intricate designs to use for bracelets, necklaces and even headbands!

You can use any size bead you like on a loom; the larger the bead, the quicker it will grow! Here is a video tutorial on how to make your very own beaded bracelet on a loom!


In this video. I use size 10 glass seed beads, thin crochet cotton and Nymo beading thread. Of course I use a loom too! The loom I have is the Jewel Loom by Beadalon.

Let me know if you enjoyed this tutorial and don't forget that you can show me pictures of your own bead looming creations on Instagram, using #TheCornerofCraft!!


Thursday 22 May 2014

Crochet for Beginners: UK Treble Crochet TR (US Double Crochet DC)

Are you starting to see where the US and UK terminology cross over? It gets very confusing when you first start, but try to just stick to just UK or US patterns when you first start so you don't have to try and "translate" them at all :)

So here is my next video, the UK treble crochet or US double crochet! I have had some lovely feedback on my videos and already have some subscribers so thank you so much for your support! Don't forget that you can subscribe too so you don't miss out on any future videos.

Tuesday 20 May 2014

Crochet for Beginners: UK Double Crochet DC (or US Single Crochet!)

So the second video that I uploaded to my YouTube channel demonstrates how to do the basic double crochet stitch! For those of you who aren't aware, US and UK crochet terms are different, annoyingly, so where I can, I will try to list the alternative term :)


Monday 19 May 2014

Crochet for beginners: Chain Stitch Ch (and my venture into YouTube...)

So I have set up a YouTube channel... I don't know if this is going to be a success or useful to anyone, but I thought I'd give it a shot anyway! My first videos are a series of how to do basic crochet stitches! There's going to be 3 videos posted a week, although that may severely cut down in the future. I sound really awkward on camera at the moment, but I'm hoping that the more I do it, the more used to it I'll become and the more relaxed I'll be :)

If you'd like to check out my channel, visit http://youtube.com/thecornerofcraft

Here's the first video! How to do the basic chain stitch: 

Saturday 17 May 2014

New Bracelets!

I treated myself on Saturday. I bought myself a bead loom from where I work and have had a lot of fun making bracelets on it! I'm getting quite speedy at it now :)

Don't mind my very-fetching pyjama trousers!
This is my first attempt. I made it while watching Eurovision (which was wonderful, as always) and it looks so 80's! I do love it though. Sewing all the ends in took me such a long time though, and I didn't even do it that neatly :/ Then I wrongly tried to add the ribbon end on, to attach my clasp on, and broke a couple of the beads... oops! I managed to salvage the rest and just sewed the clasps on, but I now know for next time!


I watched a very useful video where crochet cotton was used instead of thread for the warp of the loom. Then the ends of the bracelet could be braided and tied on the wrist that way, instead of bothering with a clasp. Because I have become obsessed with making doilies, I had treated myself to some crochet cotton and decided to give it a shot.


I love the finish of these bracelets. They're a lot more laid back, and I can charge less for them because I don't need to spend so long sewing in the ends of the bracelet!

I'm using a thinner crochet cotton with this bracelet.
And now for some better photos:


Have you ever tried using a bead loom? If so, what's your favourite warp thread to use?

Thursday 15 May 2014

Making My Own Brick Stitch Pattern

This isn't the first attempt at making my own pattern as my carrot and bunny necklace were also a "The Corner of Craft" original, but this was the first time making a pattern with this much detail!

I don't know what made me decide to make a sugar skull pendant, but something did, so I had to make it! I looked around online for a brick stitch pattern of a sugar skull, and I was left sorely disappointed. There simply weren't any around! I could only find peyote, and I'm not going there again! (I've still now finished the peyote bracelet that I started to make myself!)

After much trial and error on BeadTools, I eventually got the shape of the skull to be as close to perfect as I could manage it and the detail to match other pictures of sugar skulls I had seen. As I haven't yet bought BeadTools, I am unable to save my pattern so had to quickly make it up so I didn't lose it! Here is the finished result and I hope that you like it! This little guy is listed in my Etsy shop! http://thecornerofcraft.etsy.com


Have any of you made your own beading patterns before? If so, what's your favourite program to use?


Tuesday 13 May 2014

My Crafting Inspiration: Bead Crumbs

Time for another crafting inspiration methinks! When I first started beadweaving at the beginning of the year, I decided very early on that I didn't want to make the kind of things that everyone else seemed to be making! I was much more interested in making charms and pendants instead of whole beaded pieces of jewellery. After a bit of Etsy browsing to see what was out there, I found Bead Crumbs, aka Jayne. She is an incredible beader, based in Hawaii (SO jealous!) and she makes amazing pendants and charms of all sorts. Her patterns are inspiring and her passion for beading is slightly addictive! She's also extremely approachable, and was able to recommend a beading computer program for me to use and such.

After looking at her amazing work on Etsy, it truly inspired me to work on my own beading techniques and skills that I had newly acquired. I shall share some pictures with you now of her amazing work! All photos are taken from Jayne's blog.

How cute is this gorgeous lamb??

This hibiscus flower is so summery!
This is my favourite charm that Bead Crumbs makes!
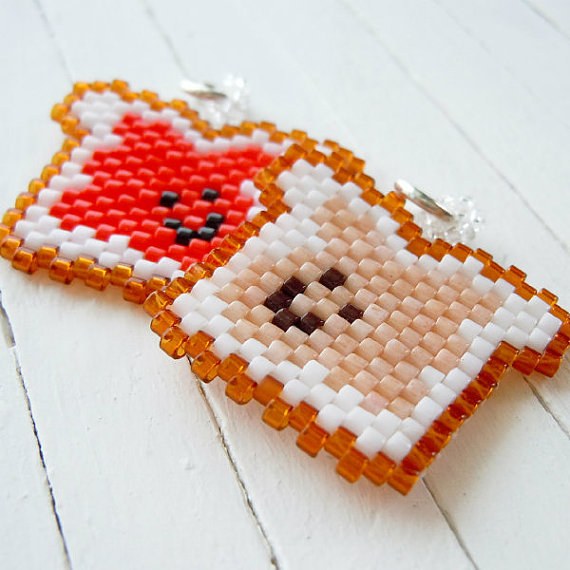
PB&J!


Bead Crumbs on Etsy: https://www.etsy.com/uk/shop/BeadCrumbs
Bead Crumbs on Facebook: https://www.facebook.com/BeadCrumbs
Bead Crumbs' Blog: http://handmadecuties.blogspot.co.uk/
Bead Crumbs on Twitter: https://twitter.com/BeadCrumbs

My Lace Making Experience

Yesterday, I went on a lace making workshop at The Malt Cross, here in Nottingham, with the very-talented Louise West, from Louise West Lace Design. Lace making was something that I'd been desperate to try and make for years and years. It looked so complicated, I thought it would take forever for me to pick up and learn!  The session was only £15 for 3hrs, and the materials were all provided for us. Unsurprisingly, the class was full! Everyone must have had the same thought as me: "when in Nottingham, learn to make lace". (Even though Nottingham lace was about the mass-production of lace, instead of the handmade stuff! Fun fact I learnt at the workshop...)


Looking at my pattern, pillow and bobbins, I was terrified. Louise taught us how to make the basic cloth stitch, which is apparently one of the two stitches used to make lace. (Only 2! I thought there would be loads!) She is so quick at making lace, which isn't surprising as she's been doing it for 21 years, I definitely was scared that I wasn't going to get my little snake bookmark finished in time!

She taught us that you only ever use 4 bobbins at once. 2 goes over 3. 2 goes over 1. 4 goes over 3 and then 2 goes over 3. We were muttering that mantra to ourselves when we first started to make the lace and were all engrossed in our work.


I soon picked it up, as I think I have a knack for patterns and sequences and was well on my way! Two hours later, I had a little snake bookmark! I'm so proud of myself :D


I thoroughly enjoyed the workshop and would recommend it to anyone, if you see Louise teaching a workshop near to you, go along! It's so therapeutic and I think I could become very addicted to making lace...

Check out Louise on Facebook, Twitter and her website for more information about her work.

Wednesday 7 May 2014

New crocheted items??

Oh hasn't time flown by: I can't believe that it's already May! It doesn't seem long since Christmas and those festivities, and now we're approaching Summer at a very fast rate, although no one seems to have told the weather that yet here in England... I guess I can't complain. Since the Bank Holiday weekend, the weather has brightened up nicely!

Anyway, enough of that chit chat. I have been working on some new crocheted items for The C of C! If you follow me on any social media, be it Twitter, Facebook or Instagram, you will know that the doily-bug has bitten! It's my ultimate dream to turn The C of C into a tea room and craft shop, hence the obsession with tea cups! But I want to kit my tea room out with crocheted doilies, which may be easier said than done to be honest... I knew they'd take me a while to make but my first one took me 7 hours!! It was 100% worth it as it's so gorgeous.


Since posting that picture, I've had several people enquire about buying a doily off of me! I started to make a slightly easier pattern, which only took me 3 and a half hours to make. Much more affordable for people!


I also took  a pattern and adapted it to make doily coasters! These still need tweaking. I think I either need to starch them or put them into a clear coaster so they're sturdier, but they only take me half an hour to make! Perfect :D


Do you think doilies are here to stay or are they just old fashioned now? Let me know your thoughts!

Wednesday 23 April 2014

New logo!

So The C of C has a new logo, designed by my very-talented friend, Lyn Bailey! Here it is in all its glory. Please let me know what you think of it. I love it and want it on a tshirt, bag, teacup, teapot... Well everything really!


Happy Easter!

I know, I know... I'm a few days late! I went to my parents' house on the south coast and spent my Easter day and half of Easter Monday with them before driving back up in preparation for going back to work on Tuesday. It was so lovely to spend some time with my family as I'd not been home since Christmas! I have seen my parents and sister, but it's not the same when it's not your house :)

After a miserable Easter, weather wise, Easter Monday was lovely! The morning was anyway... Mum, Dad, Mario and myself went for a lovely seaside stroll and made the most of the lovely weather.


 I even wore my bunny necklace on Easter day!! Now I've tweaked it, I'll be able to put it on my Etsy shop soon.


We were so lucky with chocolate! We received sooo much! We're going to be eating it for a looong time. Or I'll bake with it... Watch this space!

I hope that you all had a lovely Easter and a break from work!

Friday 11 April 2014

Easter Delights!

I've not been very well this past week, due to a cold I caught! I guess that's the risk that comes with working with the public... Anyway, a couple of weeks ago I made a cute rabbit and didn't know what to do with him. I asked the boyfriend and he told me to make it into a pendant with carrot earrings! I thought the idea was cute, but I took what he said and ran with it, and this adorable necklace was born!


Let me know what you think!