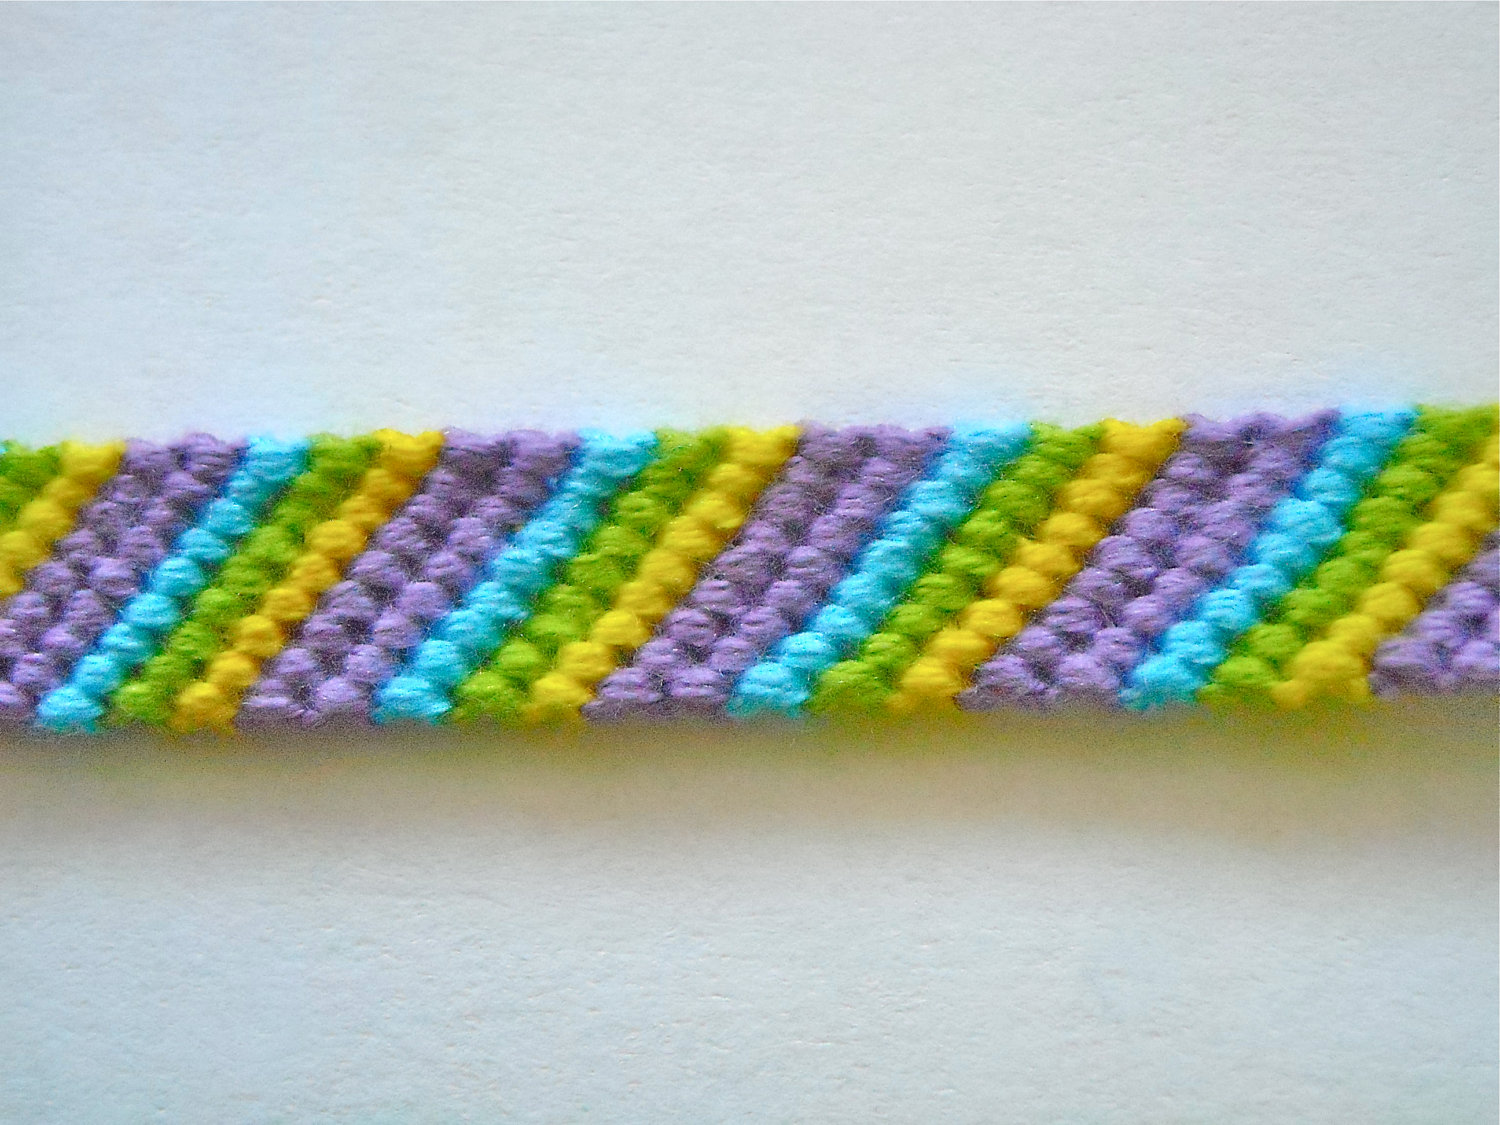
I thought I would write a post on this because a lot of things I have learnt about caring for silver plated jewellery, I have learnt since starting my job at The Bead Shop! Many things are probably obvious to some people, but I hadn't even thought of them before I was told.
Silver plated jewellery means that the bass metal (which can be copper, brass, steel, pewter, among others) has a thin coating of silver on top of this. This coating wears off over time, but there are ways to slow how quickly it's wearing! Also it's important to remember that all metal tarnishes over time. There are ways to prevent the speed that it happens at and also ways to correct it.
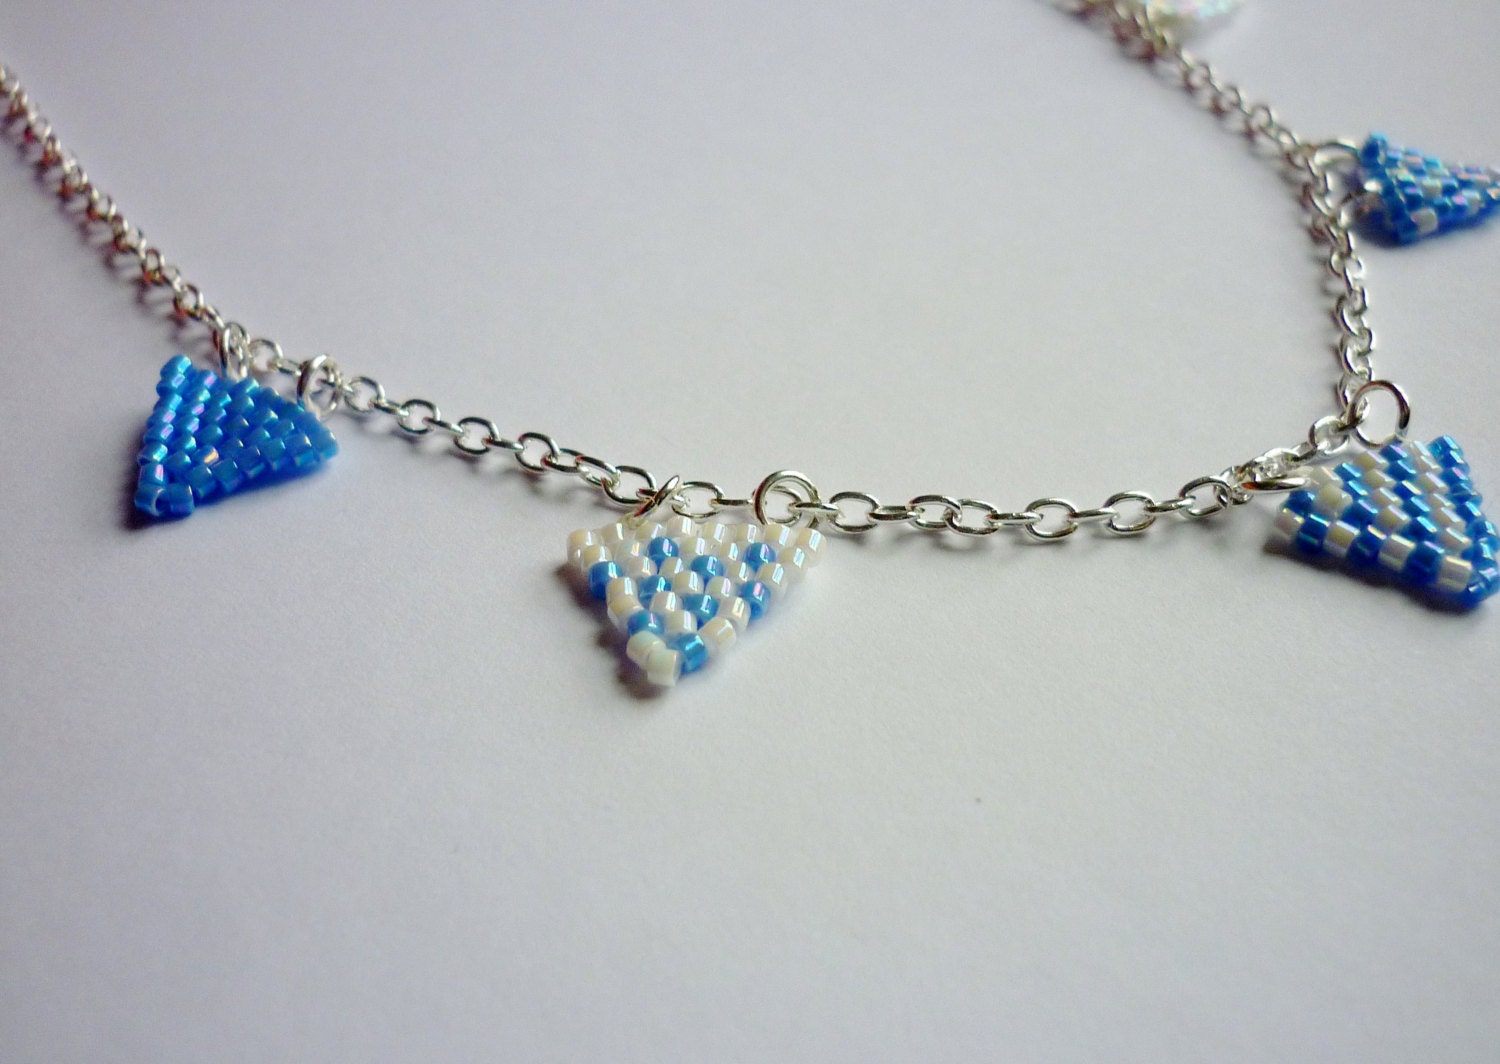
Preventing Fade and Tarnishing
Firstly try to avoid your jewellery coming in contact with moisturisers or perfumes. The chemicals will react with the plating and will cause it to tarnish quicker. Apply the moisturiser or perfume before putting the jewellery on to limit contact.
Keep the jewellery dry. Don't wear the piece if you're going swimming and definitely don't wear it in the shower!
Store the jewellery in a resealable bag, preferably with an anti-tarnish tab, to significantly slow tarnishing time. The bag will limit contact with air the piece of jewellery has. You can buy anti-tarnish tabs online and they're quite inexpensive!
Try not to sleep in it! The tossing and turning in the night will not only add stress to delicate pieces of jewellery, possibly causing them to break, but it may also cause the plating to wear off quicker. We also tend to sweat at night, which will also cause a reaction.
Cleaning Your Jewellery
If your piece of jewellery is tarnished, be sure not to use harsh chemicals to clean it. It is important to clean them often to keep them looking nice and shiny, but the chemicals are designed for "pure" metals instead of the more-delicate plated metal. The chemicals will cause the item to fade!
Instead of chemicals, use a damp cloth, such as a hand towel, and wipe gently. Use a clean towel to dry off the dampness and this should restore its shine.
If you think I've missed anything off, please let me know in the comments!!
Wednesday, 5 February 2014
Friday, 31 January 2014
Pattern Herd: Year of the Horse
So Chinese New Year has come around again and this year is the year of the horse! Coincidentally, I was born in the year of the horse too :)
If you'd like to know more about the year of the horse and what it all means, I have found a handy dandy link here. I don't know if I 100% agree with what it's saying as I can't apply some of the characteristics to myself, but I guess some of them are true!
Anyway, enough of that. You're here for a pattern herd (ironic as it's for horses) not for whether I always want to be in the limelight or if I'm great at communicating!
1) Amigurumi Horse by Tanya on Little Things Blogged
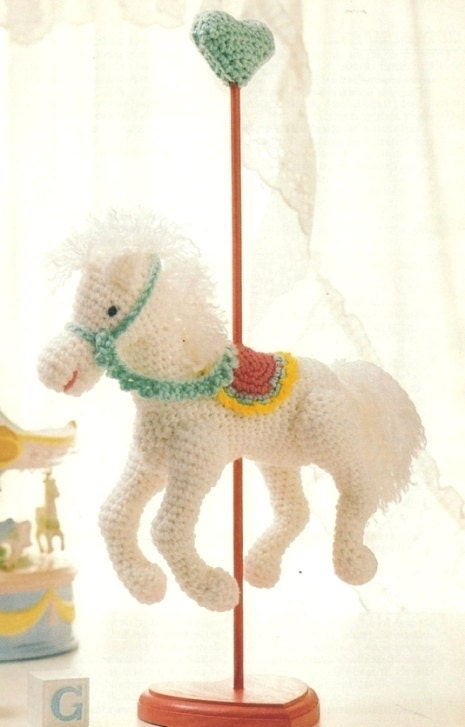
2) Carousel Horse Pattern by BeadedBundles
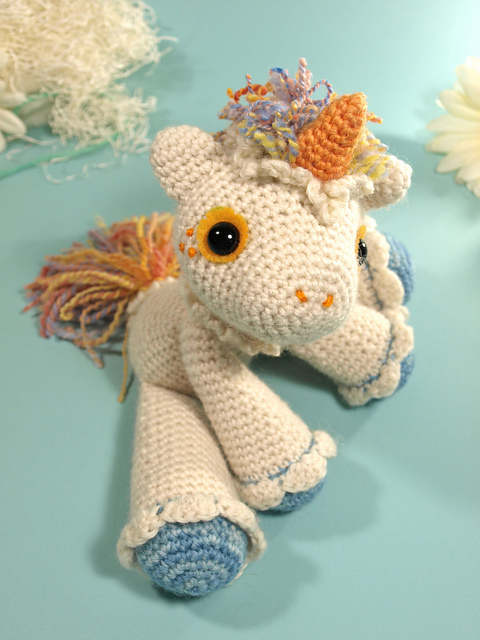
4) Hermione the Unicorn by Dawn Toussaint
I guess this pattern isn't strictly a horse, but it's a type of horse! And look at her gorgeous little face. It's difficult not to include her! A beautiful unicorn with a rainbow mane and lovely blue feet! The pattern is a free Ravelry download: http://www.ravelry.com/patterns/library/hermione-the-unicorn
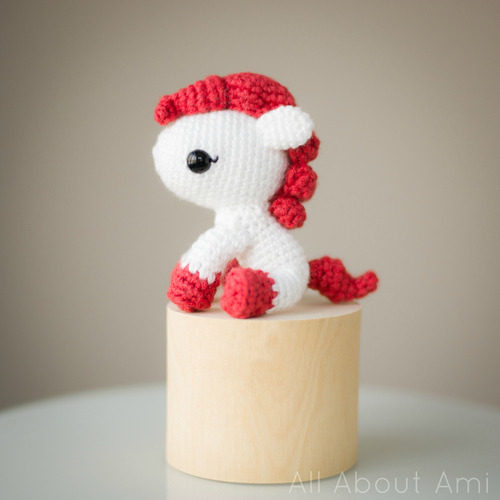
5) Pony Pattern by All About Ami
Another pattern that was made to commemorate the year of the horse, All About Ami has designed this cute little pony that could easily be adapted into a unicorn, although she is gorgeous just as she is! The pattern is available for free on All About Ami.
6) Pony Hat by NyanPon
Ah! I want one in every colour! I love this hat, it looks so snuggly and warm. Perfect, especially as it snowed here (Nottingham, UK) yesterday! We are not used to that. I love the individuality of this hat. Definitely will stand out from the crowd in this. This pattern is available for free on NyanPon's blog.
That's it from this pattern herd! If there's anything you'd like to see "herded", leave a comment!
If you'd like to know more about the year of the horse and what it all means, I have found a handy dandy link here. I don't know if I 100% agree with what it's saying as I can't apply some of the characteristics to myself, but I guess some of them are true!
Anyway, enough of that. You're here for a pattern herd (ironic as it's for horses) not for whether I always want to be in the limelight or if I'm great at communicating!
1) Amigurumi Horse by Tanya on Little Things Blogged
I love this horse! I love its bright blue colour. Guaranteed to stand out in a herd. He has an amazing oversized head and a lovely long, white mane. This pattern is available for free on Little Things Blogged.
2) Carousel Horse Pattern by BeadedBundles
I love carousels. My friend and I always go on one if there's one around when we're together! It's a tradition that started on Brighton seafront and has just continued. This carousel horse reminds me of these times and I love its simplicity. The pattern is available for download on Etsy.
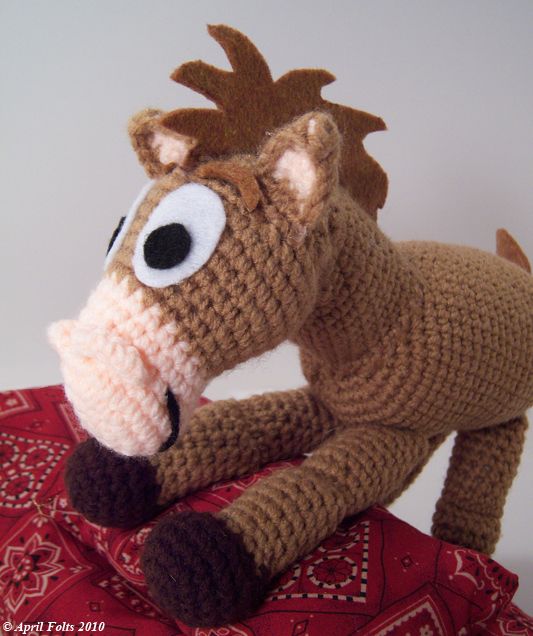
3) Brown Pony Pattern by April Draven
This "brown pony" looks suspiciously like Bullseye from Toy Story 2 and 3! I suppose for copyright reason the name wasn't used... But if you know a Toy Story fan, or you are one, then this pattern is perfect for you! It is available for free on April Draven's blog :)
4) Hermione the Unicorn by Dawn Toussaint
I guess this pattern isn't strictly a horse, but it's a type of horse! And look at her gorgeous little face. It's difficult not to include her! A beautiful unicorn with a rainbow mane and lovely blue feet! The pattern is a free Ravelry download: http://www.ravelry.com/patterns/library/hermione-the-unicorn
5) Pony Pattern by All About Ami
Another pattern that was made to commemorate the year of the horse, All About Ami has designed this cute little pony that could easily be adapted into a unicorn, although she is gorgeous just as she is! The pattern is available for free on All About Ami.
6) Pony Hat by NyanPon
Ah! I want one in every colour! I love this hat, it looks so snuggly and warm. Perfect, especially as it snowed here (Nottingham, UK) yesterday! We are not used to that. I love the individuality of this hat. Definitely will stand out from the crowd in this. This pattern is available for free on NyanPon's blog.
That's it from this pattern herd! If there's anything you'd like to see "herded", leave a comment!
New Products to The C of C on Etsy!
So it's been a while since I updated my Etsy shop and I realise how annoying that can be! I'm so sorry if anyone has been waiting for an update!
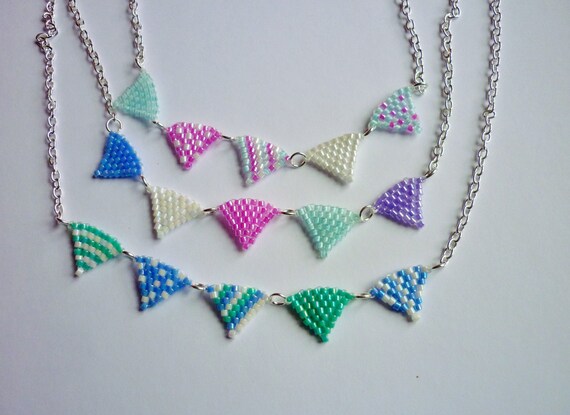
I decided to try out a new product after seeing an idea in a magazine that we stock at work, called Bead & Jewellery. It was a bead woven bunting necklace. I'd never tried bead weaving before and thought it would be highly laborious and a bit of a pain, but I was proven wrong!
I love bunting. It's my dream to learn to sew and I would have bunting everywhere! One day I will learn, but in the meantime, I will just make bunting to wear around my neck! I grabbed a few Miyuki Delica beads, some bead weaving thread and a needle and got making! I picked it up surprisingly quickly and was soon able to make some adjustments so my bead weaving was straighter.
The first couple of necklaces I made, I emulated the style in the magazine, with more spaced-out "flags". I liked how it looks, but I also wanted to add my own spin on it and make it more "my own". The next one I made, I attached each flag with a jump ring between and I much preferred that!
If you're interested in purchasing one of these necklaces, check out my Etsy shop!
I decided to try out a new product after seeing an idea in a magazine that we stock at work, called Bead & Jewellery. It was a bead woven bunting necklace. I'd never tried bead weaving before and thought it would be highly laborious and a bit of a pain, but I was proven wrong!
Bead & Jewellery Magazine. Image from mailorder-beads.co.uk
I love bunting. It's my dream to learn to sew and I would have bunting everywhere! One day I will learn, but in the meantime, I will just make bunting to wear around my neck! I grabbed a few Miyuki Delica beads, some bead weaving thread and a needle and got making! I picked it up surprisingly quickly and was soon able to make some adjustments so my bead weaving was straighter.
The first couple of necklaces I made, I emulated the style in the magazine, with more spaced-out "flags". I liked how it looks, but I also wanted to add my own spin on it and make it more "my own". The next one I made, I attached each flag with a jump ring between and I much preferred that!
First necklace I made with spaced flags.
Then I decided I liked them like this more!
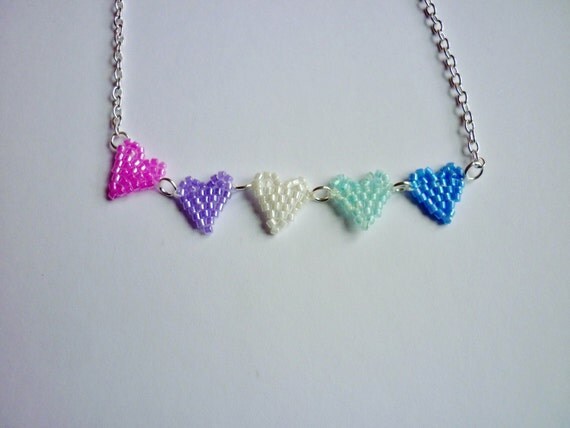
After mastering the triangular flags, I thought I'd try something a little more seasonal. Valentine's Day is just around the corner, so I found a tutorial for brick stitch hearts! The heart bunting necklace was then made! I love the solid colours of them. They remind me of LoveHeart sweets!
Available in 3 colours!
Monday, 27 January 2014
1000 views!
I'd just like to write a (very!) short post, thanking you all! I've just hit 1000 views on my blog. Thank you so much if you check back here frequently, if this is your first visit or if you pop in and out when you remember. I appreciate your support so much :)
Wednesday, 22 January 2014
Exploring Etsy: Tea Party!
For those of you who know me, you will know about my obsession with tea! I love the whole idea of a tea party, from the tea cups, to the little cakes. It just makes me happy thinking about it!
I know it's still January so an outdoor tea party isn't likely to happen for a few months, but that doesn't mean I can't indulge in a little indoor tea party! This EE will be looking at all the tea-related items that can be found on Etsy!
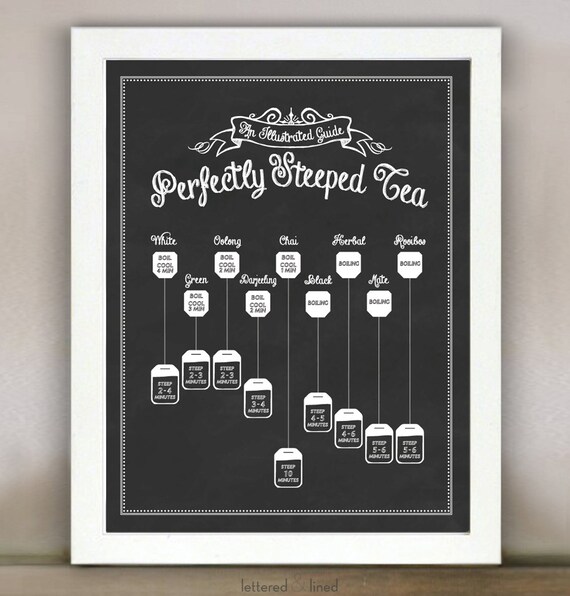
I suppose there's no point having a tea party if the tea isn't going to taste nice! Letteredandlined have made an amazing print to stop that problem! The teabags explain what temperature the water should be and how long the tea should be steeped for! This print is £14.67 and can be found here.
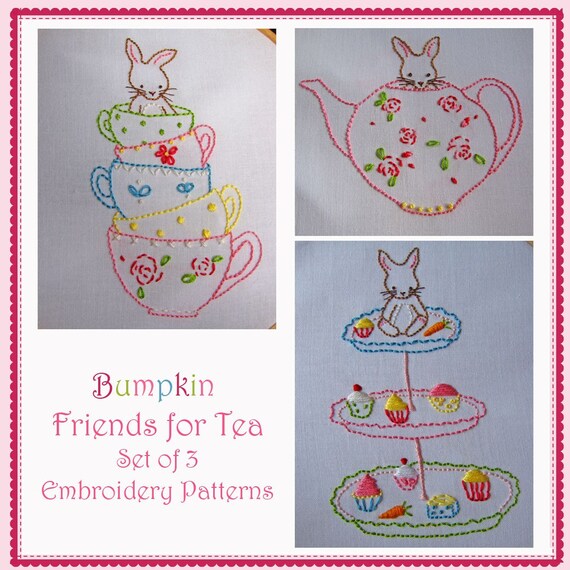
Oh if only I knew how to embroider! It would be amazing to make these! If you're fortunate enough to have this skill, Bumpkin has uploaded the PDF of these three embroidery patterns! I love the stack of teacups :) £7.62 for the patterns for these three prints and they can be found here.
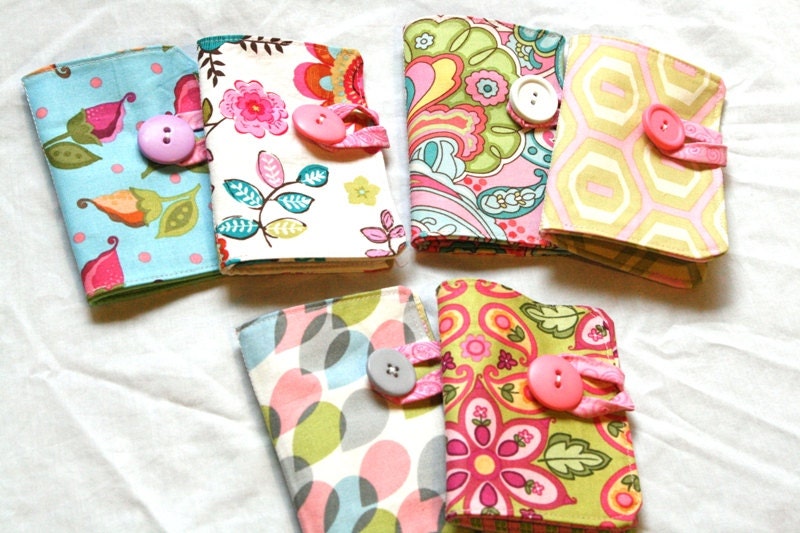
Can't bear to be too far from your favourite teas? Well eljahb has got that problem sorted for you! She has designed these cute teabag holders so you can take up to 4 teabags with you wherever you go! They're made to order therefore you can choose your fabric :) These delights are only £4.99 and can be found here.
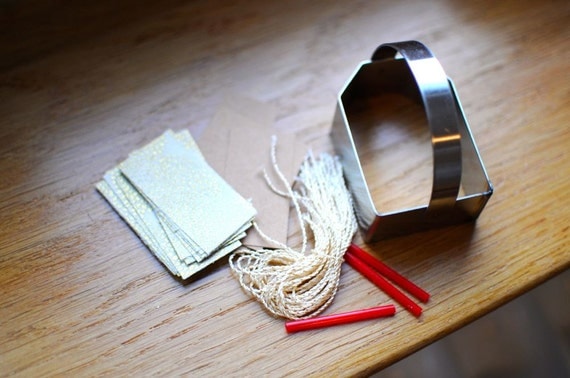
Teaspoonsf has put together this amazing kit to make delicious teabag-shaped biscuits! I love this idea :) It would be great to make Earl Grey flavoured biscuits with this biscuit cutter! Definitely something I'm going to have to invest in... This kit is £8.43 and can be purchased here.
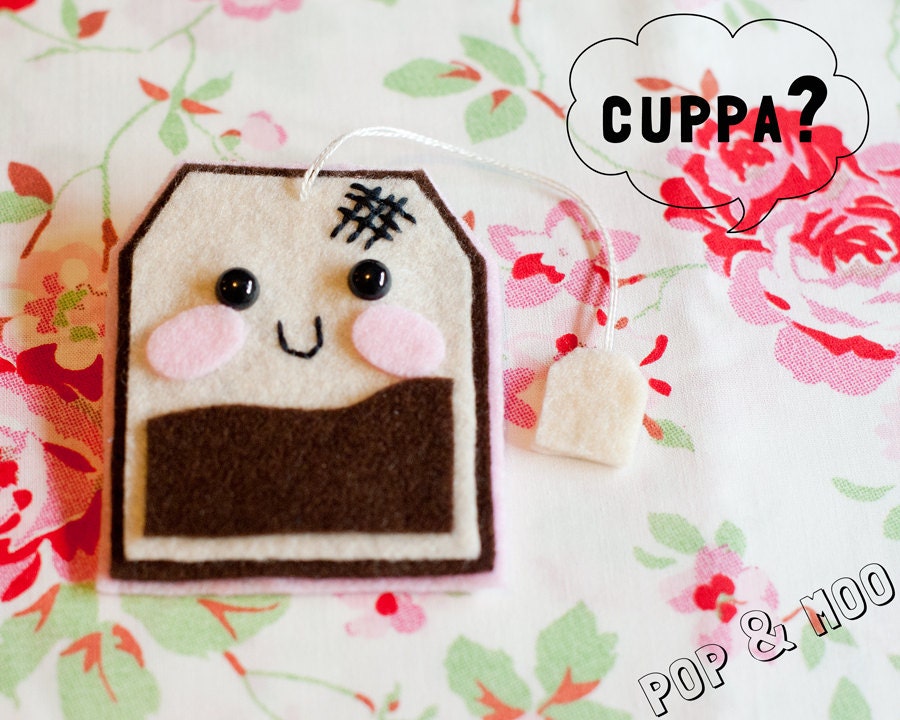
You know that I like my hair accessories, and what better than a teabag hair clip! PopandMoo have truly thought of everything here. Look at its cute, smily face :) This hair clip is on a barrette clip, which will be very secure in your hair. This little guy costs only £5.12 and can be found here.
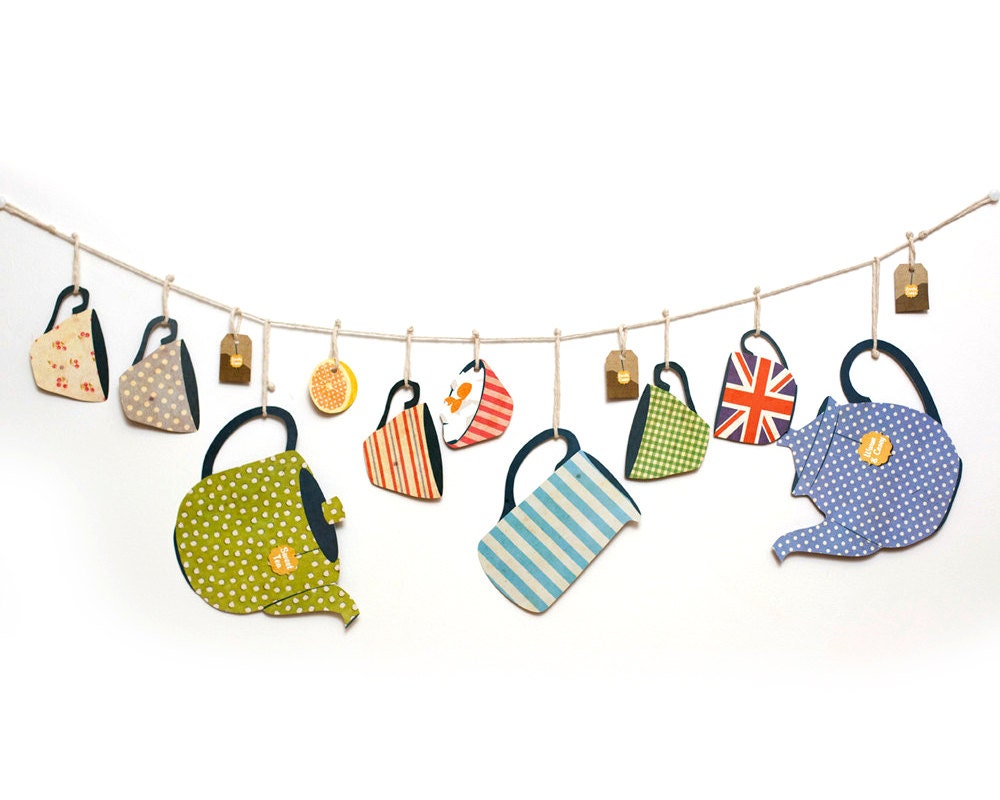
Every tea party needs decoration! To be honest, this would be right at home in my kitchen. NerdThatDraws has crafted this amazing garland using card and vintage fabrics to give it a lovely, homely feel. This garland is £10 and can be bought here.
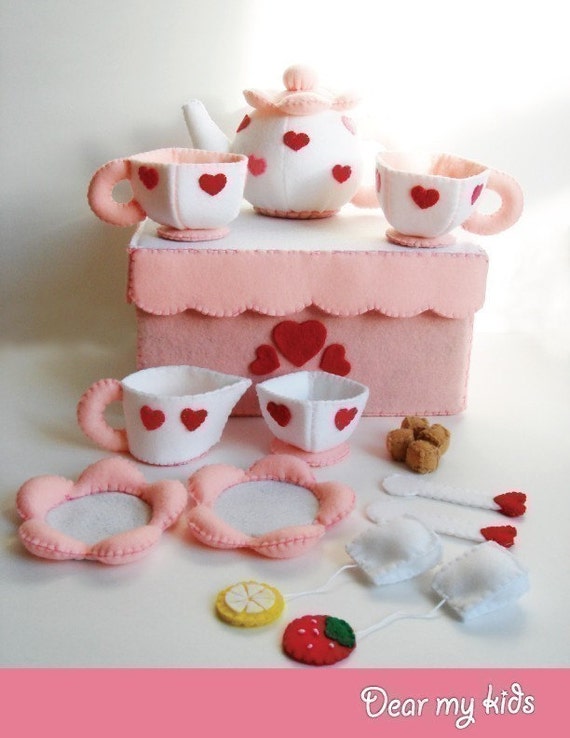
Do you have little ones who want to join in the fun? Dearmykids has kindly put up a PDF pattern to make this adorable teaset from felt, which even includes little sugar cubes! Because you have the pattern, you could make the teaset in your child's favourite colours! The pattern is £3.75 and can be downloaded from here.
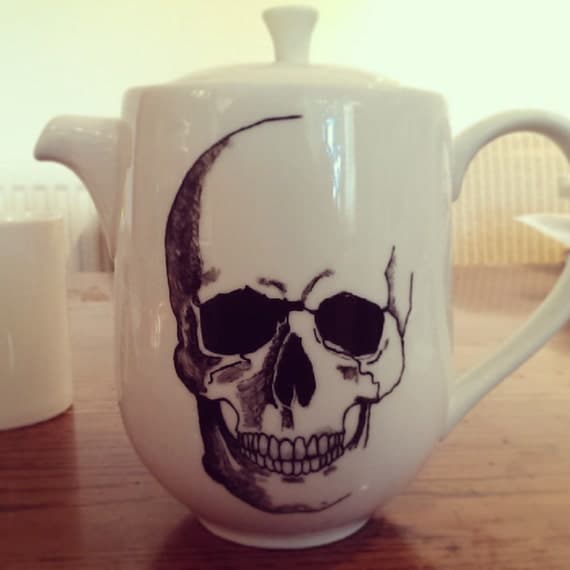
This teapot isn't as cutesy as the other things I have posted! Bycandlelight27 has handpainted this amazing skull design onto a teapot. Perfect for the skull-lovers who also love a cuppa! There are also teacups available in the skull design, so you can have a matching set. The teapot is £16.00 and can be found here.
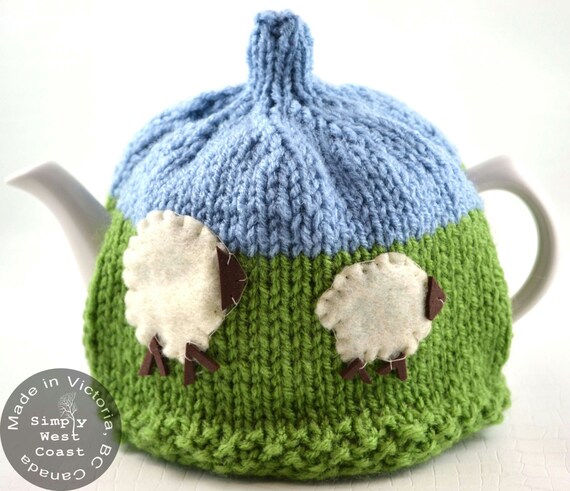
What's the point in having a teapot if the tea in it is just going to get cold? SimplyWestCoast has knitted this amazing tea cosy with gorgeous felt sheep appliquéd to the front! The tea cosy is made to order and will fit a one or two cup teapot. The tea cosy is £18.73 and can be found here.
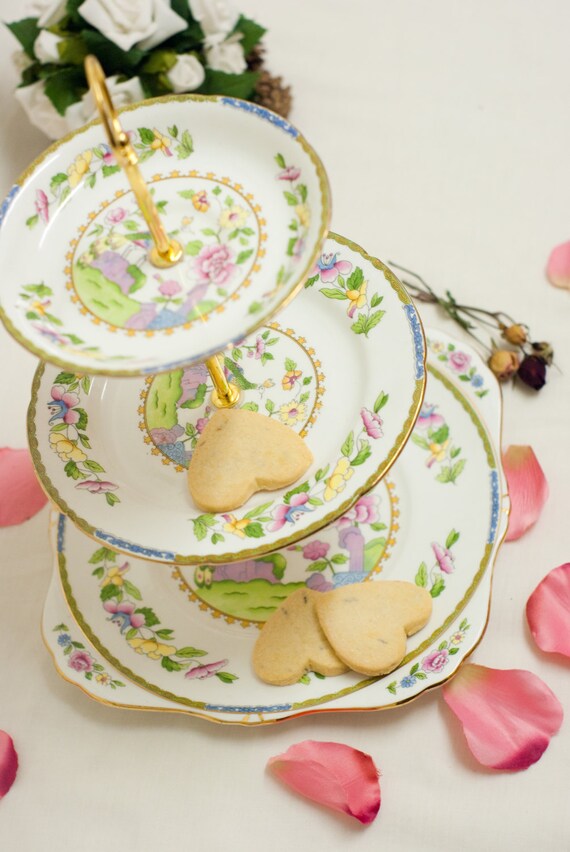
FlyingSquirrelNest has created this gorgeous 3-tier cake (or biscuit!) stand using plates and saucers. A very creative way of recycling unused crockery! I love the colours and design of this stand, although there are plenty more to choose from in the shop! This cake stand is £31.85 and can be bought here.
So that's it for this EE! I hope that you enjoyed looking at all the tea-related goodies I found! No doubt I'll have another tea-themed Exploring Etsy in the future! There are so many amazing items on Etsy!
I know it's still January so an outdoor tea party isn't likely to happen for a few months, but that doesn't mean I can't indulge in a little indoor tea party! This EE will be looking at all the tea-related items that can be found on Etsy!
I suppose there's no point having a tea party if the tea isn't going to taste nice! Letteredandlined have made an amazing print to stop that problem! The teabags explain what temperature the water should be and how long the tea should be steeped for! This print is £14.67 and can be found here.
Oh if only I knew how to embroider! It would be amazing to make these! If you're fortunate enough to have this skill, Bumpkin has uploaded the PDF of these three embroidery patterns! I love the stack of teacups :) £7.62 for the patterns for these three prints and they can be found here.
Can't bear to be too far from your favourite teas? Well eljahb has got that problem sorted for you! She has designed these cute teabag holders so you can take up to 4 teabags with you wherever you go! They're made to order therefore you can choose your fabric :) These delights are only £4.99 and can be found here.
Teaspoonsf has put together this amazing kit to make delicious teabag-shaped biscuits! I love this idea :) It would be great to make Earl Grey flavoured biscuits with this biscuit cutter! Definitely something I'm going to have to invest in... This kit is £8.43 and can be purchased here.
You know that I like my hair accessories, and what better than a teabag hair clip! PopandMoo have truly thought of everything here. Look at its cute, smily face :) This hair clip is on a barrette clip, which will be very secure in your hair. This little guy costs only £5.12 and can be found here.
Every tea party needs decoration! To be honest, this would be right at home in my kitchen. NerdThatDraws has crafted this amazing garland using card and vintage fabrics to give it a lovely, homely feel. This garland is £10 and can be bought here.
Do you have little ones who want to join in the fun? Dearmykids has kindly put up a PDF pattern to make this adorable teaset from felt, which even includes little sugar cubes! Because you have the pattern, you could make the teaset in your child's favourite colours! The pattern is £3.75 and can be downloaded from here.
This teapot isn't as cutesy as the other things I have posted! Bycandlelight27 has handpainted this amazing skull design onto a teapot. Perfect for the skull-lovers who also love a cuppa! There are also teacups available in the skull design, so you can have a matching set. The teapot is £16.00 and can be found here.
What's the point in having a teapot if the tea in it is just going to get cold? SimplyWestCoast has knitted this amazing tea cosy with gorgeous felt sheep appliquéd to the front! The tea cosy is made to order and will fit a one or two cup teapot. The tea cosy is £18.73 and can be found here.
FlyingSquirrelNest has created this gorgeous 3-tier cake (or biscuit!) stand using plates and saucers. A very creative way of recycling unused crockery! I love the colours and design of this stand, although there are plenty more to choose from in the shop! This cake stand is £31.85 and can be bought here.
So that's it for this EE! I hope that you enjoyed looking at all the tea-related goodies I found! No doubt I'll have another tea-themed Exploring Etsy in the future! There are so many amazing items on Etsy!
Monday, 20 January 2014
Friendship Bracelets for Beginners pt. 4: Backwards Knot
This knot is the one that some people get a little confused with, but I promise that it's not that hard, especially because you know the forwards knot so well now after making the candy stripe bracelet :)
The backwards knot is a very useful one to know as you'll be able to make all sorts of interesting shapes and patterns within the bracelet once you know this knot!
I'm starting with my threads in the same way as I did for the forwards knot, like so:
This means I will be tying the backwards knot with the green thread.
Holding the yellow thread taut, make a backwards "4" shape with the green thread.
Pull the tail through the loop you've just made and pull tightly.
Repeat the process...
... And that's the mystery behind the backwards knot solved!!
Now you know both forwards and backwards knots, you will be able to make chevron bracelets! I will explain how to make these bracelets in the next post of the "series" :D
The backwards knot is a very useful one to know as you'll be able to make all sorts of interesting shapes and patterns within the bracelet once you know this knot!
I'm starting with my threads in the same way as I did for the forwards knot, like so:
This means I will be tying the backwards knot with the green thread.
Holding the yellow thread taut, make a backwards "4" shape with the green thread.
Pull the tail through the loop you've just made and pull tightly.
Repeat the process...
... And that's the mystery behind the backwards knot solved!!
Now you know both forwards and backwards knots, you will be able to make chevron bracelets! I will explain how to make these bracelets in the next post of the "series" :D
Friday, 17 January 2014
Friendship Bracelets for Beginners pt.3: Candy Stripe Bracelet!
YAY! You have mastered the forwards knot! I'm so pleased because you're already equipped to make a basic bracelet!
I'm sure you have seen candy stripe bracelets before - they're the stripy friendship bracelets!
As you can see, you can use any colour combination, the coloured stripes can be varying thickness etc. As my dad says, the world is your lobster! You'll be shocked at how easy they are, and I'm a little embarrassed to dedicate a blog post to it!!
I will only be using two colours for this tutorial, although I am using 8 strings. To start a bracelet of this thickness, cut 4 lengths of approx. 1m of each colour. You will then want to knot them together and plait a length of them so you are able to tie it. Tie another knot at the end of the plaited section and lay them out, alternating like so:
Starting with your first colour, which for me is blue, tie a forwards knot (see here if your memory needs refreshing) onto the yellow thread. Be sure to tie each knot tightly to have even knotting! Continue tying forwards knots down the rest of the strings until the first thread is now the last. (My first row of knots always looks wobbly, so don't worry if yours do too! The next row will be better, I promise.)
Now you want to take your second thread (for me, yellow) and knot another row of forwards knots, like you've just done. (See? I said the second row would be neater :) )
Continue to tie rows of forwards knots until your bracelet reaches the desired length. I always go for a little bit shorter than once around my wrist.
Tie a knot and plait the threads together, so it's the same length as the plait at the beginning. Tie one final knot, trim the ends and wear your bracelet with pride!!
Go and try your threads in different orders to get different looks.
I'm sure you have seen candy stripe bracelets before - they're the stripy friendship bracelets!
As you can see, you can use any colour combination, the coloured stripes can be varying thickness etc. As my dad says, the world is your lobster! You'll be shocked at how easy they are, and I'm a little embarrassed to dedicate a blog post to it!!
I will only be using two colours for this tutorial, although I am using 8 strings. To start a bracelet of this thickness, cut 4 lengths of approx. 1m of each colour. You will then want to knot them together and plait a length of them so you are able to tie it. Tie another knot at the end of the plaited section and lay them out, alternating like so:
Starting with your first colour, which for me is blue, tie a forwards knot (see here if your memory needs refreshing) onto the yellow thread. Be sure to tie each knot tightly to have even knotting! Continue tying forwards knots down the rest of the strings until the first thread is now the last. (My first row of knots always looks wobbly, so don't worry if yours do too! The next row will be better, I promise.)
Now you want to take your second thread (for me, yellow) and knot another row of forwards knots, like you've just done. (See? I said the second row would be neater :) )
Continue to tie rows of forwards knots until your bracelet reaches the desired length. I always go for a little bit shorter than once around my wrist.
Tie a knot and plait the threads together, so it's the same length as the plait at the beginning. Tie one final knot, trim the ends and wear your bracelet with pride!!
Go and try your threads in different orders to get different looks.
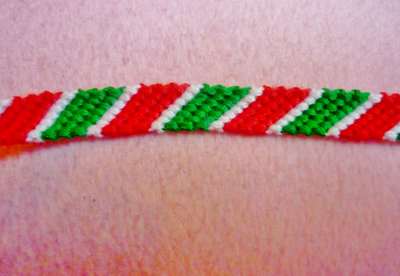
This bracelet I made, I used 3 strands of each colour, except for white, which I only used 2 of.. I spaced them out like GGG W RRR W. I knotted the them the same way as above.
Subscribe to:
Posts (Atom)